Неустрашимый user register php. Создание простой системы регистрации пользователей на PHP и MySQL
Much of the websites have a registration form for your users to sign up and thus may benefit from some kind of privilege within the site. In this article we will see how to create a registration form in PHP and MySQL.
We will use simple tags and also we will use table tag to design the Sign-Up.html webpage. Let’s start:
Listing 1 : sign-up.html
Sign-Up Registration Form
| Name | |
| UserName | |
| Password | |
| Confirm Password | |
Figure 1:
Description of sing-in.html webpage:As you can see the Figure 1, there is a Registration form and it is asking few data about user. These are the common data which ask by any website from his users or visitors to create and ID and Password. We used table tag because to show the form fields on the webpage in a arrange form as you can see them on Figure 1. It’s looking so simple because we yet didn’t used CSS Style on it now let’s we use CSS styles and link the CSS style file with sing-up.html webpage.
Listing 2 : style.css
/*CSS File For Sign-Up webpage*/ #body-color{ background-color:#6699CC; } #Sign-Up{ background-image:url("sign-up.png"); background-size:500px 500px; background-repeat:no-repeat; background-attachment:fixed; background-position:center; margin-top:150px; margin-bottom:150px; margin-right:150px; margin-left:450px; padding:9px 35px; } #button{ border-radius:10px; width:100px; height:40px; background:#FF00FF; font-weight:bold; font-size:20px; }
Listing 3 : Link style.css with sign-up.html webpage

Figure 2:
Description of style.css file:In the external CSS file we used some styles which could be look new for you. As we used an image in the background and set it in the center of the webpage. Which is become easy to use by the help of html div tag. As we used three div tag id’s. #button, #sing-up, and #body-color and we applied all CSS styles on them and now you can see the Figure 2, how much it’s looking beautiful and attractive. You can use many other CSS styles as like 2D and 3D CSS styles on it. It will look more beautiful than its looking now.
After these all simple works we are now going to create a database and a table to store all data in the database of new users. Before we go to create a table we should know that what we require from the user. As we designed the form we will create the table according to the registration form which you can see it on Figure 1 & 2.
Listing 3 : Query for table in MySQL
CREATE TABLE WebsiteUsers (userID int(9) NOT NULL auto_increment, fullname VARCHAR(50) NOT NULL, userName VARCHAR(40) NOT NULL, email VARCHAR(40) NOT NULL, pass VARCHAR(40) NOT NULL, PRIMARY KEY(userID));
Description of Listing 3:One thing you should know that if you don’t have MySQL facility to use this query, so should follow my previous article about . from this link you will able to understand the installation and requirements. And how we can use it.
In the listing 3 query we used all those things which we need for the registration form. As there is Email, Full name, password, and user name variables. These variable will store data of the user, which he/she will input in the registration form in Figure 2 for the sing-up.
After these all works we are going to work with PHP programming which is a server side programming language. That’s why need to create a connection with the database.
Listing 4 : Database connection
Description of Listing 4:We created a connection between the database and our webpages. But if you don’t know is it working or not so you use one thing more in the last check listing 5 for it.
Listing 5 : checking the connection of database connectivity
Description Listing 5:In the Listing 5 I just tried to show you that you can check and confirm the connection between the database and PHP. And one thing more we will not use Listing 5 code in our sing-up webpage. Because it’s just to make you understand how you can check the MySQL connection.
Now we will write a PHP programming application to first check the availability of user and then store the user if he/she is a new user on the webpage.
Listing 6 : connectivity-sign-up.php
Description of connectivity-sign-up.phpIn this PHP application I used simplest way to create a sign up application for the webpages. As you can see first we create a connection like listing 4. And then we used two functions the first function is SignUP() which is being called by the if statement from the last of the application, where its first confirming the pressing of sign up button. If it is pressed then it will call the SingUp function and this function will use a query of SELECT to fetch the data and compare them with userName and email which is currently entered from the user. If the userName and email is already present in the database so it will say sorry you are already registered
If the user is new as its currently userName and email ID is not present in the database so the If statement will call the NewUser() where it will store the all information of the new user. And the user will become a part of the webpage.

Figure 3
In the figure 3, user is entering data to sign up if the user is an old user of this webpage according to the database records. So the webpage will show a message the user is registered already if the user is new so the webpage will show a message the user’s registration is completed.

Figure 4:
As we entered data to the registration form (Figure 4), according to the database which userName and email we entered to the registration form for sing-up it’s already present in the database. So we should try a new userName and email address to sign-up with a new ID and Password.

Figure 5
In figure 5, it is confirming us that which userName and email id user has entered. Both are not present in the database records. So now a new ID and Password is created and the user is able to use his new ID and Password to get login next time.
Conclusion:In this article we learnt the simplest way of creating a sign up webpage. We also learnt that how it deals with the database if we use PHP and MySQL. I tried to give you a basic knowledge about sign up webpage functionality. How it works at back end, and how we can change its look on front end. For any query don’t hesitate and comment.
Процесс создания системы регистрации – это довольно большой объем работы. Вам нужно написать код, который бы перепроверял валидность email-адресов, высылал email-письма с подтверждением, предлагал возможность восстановить пароль, хранил бы пароли в безопасном месте, проверял формы ввода и многое другое. Даже когда вы все это сделаете, пользователи будут регистрироваться неохотно, так как даже самая минимальная регистрация требует их активности.
В сегодняшнем руководстве мы займемся разработкой простой системы регистрации, с использованием которой вам не понадобятся никакие пароли! В результаты мы получим, систему, которую можно будет без труда изменить или встроить в существующий PHP-сайт. Если вам интересно, продолжайте чтение.
PHP
Теперь мы готовы к тому, чтобы заняться кодом PHP. Основной функционал системы регистрации предоставляется классом User, который вы можете видеть ниже. Класс использует (), представляющую собой минималистскую библиотеку для работы с базами данных. Класс User отвечает за доступ к базам данных, генерирование token-ов для логина и их валидации. Он представляет нам простой интерфейс, который можно без труда включить в систему регистрации на ваших сайтах, основанных на PHP.
User.class.php
// Private ORM instance
private $orm;
/**
* Find a user by a token string. Only valid tokens are taken into
* consideration. A token is valid for 10 minutes after it has been generated.
* @param string $token The token to search for
* @return User
*/
Public static function findByToken($token){
// find it in the database and make sure the timestamp is correct
->where("token", $token)
->where_raw("token_validity > NOW()")
->find_one();
If(!$result){
return false;
}
Return new User($result);
}
/**
* Either login or register a user.
* @return User
*/
Public static function loginOrRegister($email){
// If such a user already exists, return it
If(User::exists($email)){
return new User($email);
}
// Otherwise, create it and return it
Return User::create($email);
}
/**
* Create a new user and save it to the database
* @param string $email The user"s email address
* @return User
*/
Private static function create($email){
// Write a new user to the database and return it
$result = ORM::for_table("reg_users")->create();
$result->email = $email;
$result->save();
Return new User($result);
}
/**
* Check whether such a user exists in the database and return a boolean.
* @param string $email The user"s email address
* @return boolean
*/
Public static function exists($email){
// Does the user exist in the database?
$result = ORM::for_table("reg_users")
->where("email", $email)
->count();
Return $result == 1;
}
/**
* Create a new user object
* @param $param ORM instance, id, email or null
* @return User
*/
Public function __construct($param = null){
If($param instanceof ORM){
// An ORM instance was passed
$this->orm = $param;
}
else if(is_string($param)){
// An email was passed
$this->
->where("email", $param)
->find_one();
}
else{
If(is_numeric($param)){
// A user id was passed as a parameter
$id = $param;
}
else if(isset($_SESSION["loginid"])){
// No user ID was passed, look into the sesion
$id = $_SESSION["loginid"];
}
$this->orm = ORM::for_table("reg_users")
->where("id", $id)
->find_one();
}
/**
* Generates a new SHA1 login token, writes it to the database and returns it.
* @return string
*/
Public function generateToken(){
// generate a token for the logged in user. Save it to the database.
$token = sha1($this->email.time().rand(0, 1000000));
// Save the token to the database,
// and mark it as valid for the next 10 minutes only
$this->orm->set("token", $token);
$this->orm->set_expr("token_validity", "ADDTIME(NOW(),"0:10")");
$this->orm->save();
Return $token;
}
/**
* Login this user
* @return void
*/
Public function login(){
// Mark the user as logged in
$_SESSION["loginid"] = $this->orm->id;
// Update the last_login db field
$this->orm->set_expr("last_login", "NOW()");
$this->orm->save();
}
/**
* Destroy the session and logout the user.
* @return void
*/
Public function logout(){
$_SESSION = array();
unset($_SESSION);
}
/**
* Check whether the user is logged in.
* @return boolean
*/
Public function loggedIn(){
return isset($this->orm->id) && $_SESSION["loginid"] == $this->orm->id;
}
/**
* Check whether the user is an administrator
* @return boolean
*/
Public function isAdmin(){
return $this->rank() == "administrator";
}
/**
* Find the type of user. It can be either admin or regular.
* @return string
*/
Public function rank(){
if($this->orm->rank == 1){
return "administrator";
}
Return "regular";
}
/**
* Magic method for accessing the elements of the private
* $orm instance as properties of the user object
* @param string $key The accessed property"s name
* @return mixed
*/
Public function __get($key){
if(isset($this->orm->$key)){
return $this->orm->$key;
}
Return null;
}
}
Token-ы генерируются при помощи алгоритма , и сохраняются в базу данных. Мы используем из MySQL для установки значения в колонку token_validity, равного 10 минутам. При валидации token, мы сообщаем движку, что нам нужен token, поле token_validity пока еще не истекло. Таким образом мы ограничиваем время, в течение которого token будет валиден.
Обратите внимание на то, что мы используем волшебный метод __get () в конце документа, чтобы получить доступ к свойствам объекта user. Это позволяет нам осуществить доступ к данным, которые хранятся в базе данных в виде свойств: $user->email, $user->token. Для примера давайте посмотрим, как мы можем использовать этот класс в следующем фрагменте кода:

Еще один файл, в котором хранится необходимый функционал, это functions.php. Там у нас есть несколько вспомогательных функций, которые позволяют нам сохранить остальной код более опрятным.
Functions.php
Function send_email($from, $to, $subject, $message){
// Helper function for sending email
$headers = "MIME-Version: 1.0" . "\r\n";
$headers .= "Content-type: text/plain; charset=utf-8" . "\r\n";
$headers .= "From: ".$from . "\r\n";
Return mail($to, $subject, $message, $headers);
}
function get_page_url(){
// Find out the URL of a PHP file
$url = "http".(empty($_SERVER["HTTPS"])?"":"s")."://".$_SERVER["SERVER_NAME"];
If(isset($_SERVER["REQUEST_URI"]) && $_SERVER["REQUEST_URI"] != ""){
$url.= $_SERVER["REQUEST_URI"];
}
else{
$url.= $_SERVER["PATH_INFO"];
}
Return $url;
}
function rate_limit($ip, $limit_hour = 20, $limit_10_min = 10){
// The number of login attempts for the last hour by this IP address
$count_hour = ORM::for_table("reg_login_attempt")
->
->where_raw("ts > SUBTIME(NOW(),"1:00")")
->count();
// The number of login attempts for the last 10 minutes by this IP address
$count_10_min = ORM::for_table("reg_login_attempt")
->where("ip", sprintf("%u", ip2long($ip)))
->where_raw("ts > SUBTIME(NOW(),"0:10")")
->count();
If($count_hour > $limit_hour || $count_10_min > $limit_10_min){
throw new Exception("Too many login attempts!");
}
}
function rate_limit_tick($ip, $email){
// Create a new record in the login attempt table
$login_attempt = ORM::for_table("reg_login_attempt")->create();
$login_attempt->email = $email;
$login_attempt->ip = sprintf("%u", ip2long($ip));
$login_attempt->save();
}
function redirect($url){
header("Location: $url");
exit;
}
Функции rate_limit и rate_limit_tick позволяют нам ограничивать число попыток авторизации на определенный промежуток времени. Попытки авторизации записываются в базу данных reg_login_attempt. Эти функции запускаются при проведении подтверждения формы авторизации, как можно видеть в следующем фрагменте кода.
Нижеприведенный код был взят из index.php, и он отвечает за подтверждение формы авторизации. Он возвращает JSON-ответ, который управляется кодом jQuery, который мы видели в assets/js/script.js.
index.php
If(!empty($_POST) && isset($_SERVER["HTTP_X_REQUESTED_WITH"])){
// Output a JSON header
Header("Content-type: application/json");
// Is the email address valid?
If(!isset($_POST["email"]) || !filter_var($_POST["email"], FILTER_VALIDATE_EMAIL)){
throw new Exception("Please enter a valid email.");
}
// This will throw an exception if the person is above
// the allowed login attempt limits (see functions.php for more):
rate_limit($_SERVER["REMOTE_ADDR"]);
// Record this login attempt
rate_limit_tick($_SERVER["REMOTE_ADDR"], $_POST["email"]);
// Send the message to the user
$message = "";
$email = $_POST["email"];
$subject = "Your Login Link";
If(!User::exists($email)){
$subject = "Thank You For Registering!";
$message = "Thank you for registering at our site!\n\n";
}
// Attempt to login or register the person
$user = User::loginOrRegister($_POST["email"]);
$message.= "You can login from this URL:\n";
$message.= get_page_url()."?tkn=".$user->generateToken()."\n\n";
$message.= "The link is going expire automatically after 10 minutes.";
$result = send_email($fromEmail, $_POST["email"], $subject, $message);
If(!$result){
throw new Exception("There was an error sending your email. Please try again.");
}
Die(json_encode(array(
"message" => "Thank you! We\"ve sent a link to your inbox. Check your spam folder as well."
)));
}
}
catch(Exception $e){
Die(json_encode(array(
"error"=>1,
"message" => $e->getMessage()
)));
}
При успешной авторизации или регистрации, вышеприведенный код отсылает email человеку с ссылкой для авторизации. Token (лексема) становится доступной в качестве $_GET-переменной "tkn" ввиду сгенерированного URL.
index.php
If(isset($_GET["tkn"])){
// Is this a valid login token?
$user = User::findByToken($_GET["tkn"]);
// Yes! Login the user and redirect to the protected page.
$user->login();
redirect("protected.php");
}
// Invalid token. Redirect back to the login form.
redirect("index.php");
}
Запуск $user->login() создаст необходимые переменные для сессии, что позволит пользователю оставаться авторизованным при последующих входах.
Выход из системы реализуется примерно таким же образом:
Index.php
If(isset($_GET["logout"])){
$user = new User();
If($user->loggedIn()){
$user->logout();
}
Redirect("index.php");
}
В конце кода мы снова перенаправляем пользователя на index.php, поэтому параметр?logout=1 в URL исключается.
Нашему файлу index.php также потребуется защита – мы не хотим, чтобы уже авторизованные пользователи видели форму. Для этого мы используем метод $user->loggedIn():
Index.php
$user = new User();
if($user->loggedIn()){
redirect("protected.php");
}
Наконец, давайте посмотрим, как можно защитить страницу вашего сайта, и сделать ее доступной только после авторизации:
protected.php
// To protect any php page on your site, include main.php
// and create a new User object. It"s that simple!
require_once "includes/main.php";
$user = new User();
if(!$user->loggedIn()){
redirect("index.php");
}
После этой проверки вы можете быть уверены в том, что пользователь успешно авторизовался. У вас также будет доступ к данным, которые хранятся в базе данных в качестве свойств объекта $user. Чтобы вывести email пользователя и их ранг, воспользуйтесь следующим кодом:
Echo "Your email: ".$user->email;
echo "Your rank: ".$user->rank();
Здесь rank() – это метод, так как колонка rank в базе данных обычно содержит числа (0 для обычных пользователей и 1 для администраторов), и нам нужно преобразовать это все в названия рангов, что реализуется при помощи данного метода. Чтобы преобразовать обычного пользователя в администратора, просто отредактируйте запись о пользователе в phpmyadmin (либо в любой другой программе по работе с базами данных). Будучи администратором, пользователь не будет наделен какими-то особыми возможностями. Вы сами в праве выбирать, каким правами наделять администраторов.
Готово!
На этом наша простенькая система регистрации готова! Вы можете использовать ее на уже существующем PHP-сайте, либо модернизировать ее, придерживаясь собственных требований.
Reg.ru: домены и хостинг
Крупнейший регистратор и хостинг-провайдер в России.
Более 2 миллионов доменных имен на обслуживании.
Продвижение, почта для домена, решения для бизнеса.
Более 700 тыс. клиентов по всему миру уже сделали свой выбор.
*Наведите курсор мыши для приостановки прокрутки.
Назад Вперед
Создание простой системы регистрации пользователей на PHP и MySQLСоздание системы регистрации - это большая работа. Вам приходится писать код, который осуществляет валидацию email-адресов, отправляет сообщение на почту с подтверждением регистрации, а также осуществляет валидацию остальных полей формы, и много ещё всего.
И даже после того как вы всё это напишите, пользователи будут регистрироваться неохотно, т.к. это требует определённых усилий с их стороны.
В этом уроке, мы создадим очень простую систему регистрации, которая не требует и не хранит паролей вообще! Результат будет легко изменить и добавить к уже существующему PHP-сайту. Хотите выяснить, как это работает? Читайте ниже.
Вот как наша супер простая система будет работать:
Мы скомбинируем форму авторизации и регистрацию. В этой форме будет поле для ввода email-адреса и кнопка регистрации;
- При заполнении поля email-адресом, по нажатию на кнопку регистрации будет создана запись о новом пользователе, но только в том случае, если введённого email-адреса не было найдено в базе данных.
После этого создаётся некий случайный уникальный набор символов (токен), который отправляется на указанную пользователем почту в виде ссылки, которая будет актуальна в течение 10 минут;
- По ссылке пользователь переходит на наш сайт. Система определяет наличие токена и авторизует пользователя;
Преимущества такого подхода:
Не нужно хранить пароли и осуществлять валидацию полей;
- Нет необходимости в восстановлении пароля, секретных вопросов и т.д.;
- С момента как пользователь зарегистрировался/авторизовался вы можете всегда быть уверены, что этот пользователь будет в вашей зоне доступа (что email-адрес является истинным);
- Невероятно простой процесс регистрации;
Недостатки:
Безопасность аккаунта пользователя. Если кто-то имеет доступ к почте пользователя, он может авторизоваться.
- Email не защищён и может быть перехвачен. Имейте в виду, что этот вопрос актуален и в случае, когда пароль был забыт и его необходимо восстановить, или в любой системе авторизации, которая не использует HTTPS для передачи данных (логин/пароль);
- Пока вы настроите как нужно почтовый сервер, существует шанс, что сообщения со ссылками на авторизацию будут попадать в спам;
Сравнивая преимущества и недостатки нашей системы, можно сказать, что система имеет высокое юзабилити (максимально удобна для конечного пользователя) и, в то же время, имеет невысокий показатель безопасности.
Так что использовать её предлагается для регистраций на форумах и сервисах, которые не работают с важной информацией.
Как пользоваться этой системой
В случае, когда вам нужно просто использовать систему для авторизации пользователей на вашем сайте, и вам не хочется разбирать данный урок по косточкам, вот что вам нужно сделать:
Вам нужно скачать исходники, приложенные к уроку
- В архиве найти файл tables.sql
Импортируйте его в вашу базу данных используя опцию импорта в phpMyAdmin. Альтернативный способ: открыть этот файл через текстовый редактор, скопировать SQL запрос и выполнить его;
- Открыть includes/main.php
и заполнить настройки связи с вашей базой данных (указать пользователя и пароль для связи с базой а также хост и имя базы). В этом же файле, вы также должны указать email, который будет использован в качестве оригинального адреса для сообщений отправляемых системой. Некоторые хосты блокируют исходящие мейлы пока в форме не будет указан настоящий email адрес, который был создан из панели управления хостом, так что укажите реальный адрес;
- Загрузите все файлы index.php
, protected.php
и папки assets и includes через FTP на ваш хост;
- Добавьте код ниже на каждую PHP-страницу, где нужно отобразить форму авторизации;
Require_once "includes/main.php";
$user = new User();
if(!$user->loggedIn()){
redirect("index.php");
}
- Готово!
Для тех же, кому интересно, как это всё работает - вперёд к чтению ниже!
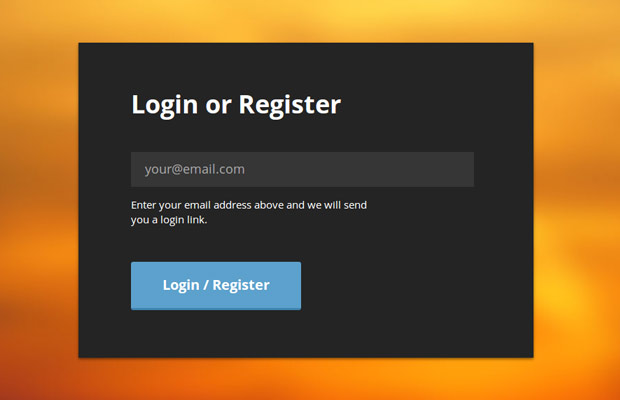
Первый шаг - написание HTM- кода формы авторизации. Данный код располагается в файле index.php . Этот файл также содержит PHP-код, обрабатывающий данные формы и другие полезные функции системы авторизации. Узнать об этом больше можно в разделе ниже, посвящённом обзору PHP кода.
index.php
Tutorial: Super Simple Registration System With PHP & MySQL Login or Register
Enter your email address above and we will send
you a login link.
В головной секции (между тегами и ) я подключил основные стили (в этом уроке они не разбираются, поэтому вы можете посмотреть их сами. Папка assets/css/style.css). До закрывающего тега я подключил библиотеку jQuery и файл script.js, который мы напишем и разберём чуть ниже.
JavaScript
jQuery отслеживает состояние кнопки "Зарегистрироваться/авторизоваться" с помощью функции e.preventDefault() и отправляет AJAX-запросы. В зависимости от ответа сервера, выводит то или иное сообщение и определяет дальнейшие действия/
assets/js/script.js
$(function(){ var form = $("#login-register"); form.on("submit", function(e){ if(form.is(".loading, .loggedIn")){ return false; } var email = form.find("input").val(), messageHolder = form.find("span"); e.preventDefault(); $.post(this.action, {email: email}, function(m){ if(m.error){ form.addClass("error"); messageHolder.text(m.message); } else{ form.removeClass("error").addClass("loggedIn"); messageHolder.text(m.message); } }); }); $(document).ajaxStart(function(){ form.addClass("loading"); }); $(document).ajaxComplete(function(){ form.removeClass("loading"); }); });
был добавлен в форму для отображения текущего состояния AJAX-запроса (это стало возможным благодаря методам ajaxStart() ) и ajaxComplete() , которые вы сможете найти ближе к концу файла).Этот класс показывает крутящийся анимированный gif-файл (как бы намекающий нам на то, что запрос обрабатывается), и также выступает как флаг, предотвращающий повторную отправку формы (когда кнопка зарегистрироваться была уже однажды нажата). Класс .loggedIn - это другой флаг, - устанавливается тогда, когда был отправлен email. Этот флаг моментально блокирует любые дальнейшие действия с формой.
Схема базы данных
Наша невероятно простая система регистрации использует 2 MySQL таблицы (SQL-код находится в файле tables.sql ). Первая хранит данные об аккаунтах пользователей. Вторая хранит информацию о количестве попыток входа.

Схема таблицы пользователей.
Система не использует паролей, что видно на схеме. На ней же можно увидеть колонку token с токенами, соседствующую с колонкой token_validity . Токен устанавливается как только пользователь подключается к системе, задаёт свой email для отправки сообщения (чуть подробнее об этом в следующем блоке). Колонка token_validity устанавливает время на 10 минут позже, после которого токен перестаёт быть актуальным.

Схема таблицы, считающая количество попыток авторизации.
В обоих таблицах IP-адрес хранится в обработанном виде, с помощью функции ip2long в поле типа integer.
Теперь мы можем написать немножко PHP-кода. Основной функционал системы возложен на класс User.class.php , который вы можете видеть ниже.
Данный класс активно использует idorm (docs), эти библиотеки являются минимально необходимыми инструментами, для работы с базами данных. Он обрабатывает доступ к базе данных, генерацию токенов и их валидацию. Он представляет собой простой интерфейс, позволяющий легко подключить систему регистрации к вашему сайту, если он использует PHP.
User.class.php
Class User{ // Частный ORM случай private $orm; /** * Найти пользователя по токену. Только валидные токены, приняты к рассмотрению. Токен генерируется только на 10 минут с того момента как был создан * @param string $token. Это искомый токен * @return User. Вернуть значение функции User */ public static function findByToken($token){ // найти токен в базе и убедиться, что установлен корректный временной штамп $result = ORM::for_table("reg_users") ->where("token", $token) ->where_raw("token_validity > NOW()") ->find_one(); if(!$result){ return false; } return new User($result); } /** * Авторизовать или зарегистрировать пользователя * @param string $email. Пользовательский email-адрес * @return User */ public static function loginOrRegister($email){ // Если такой пользователь уже существует, вернуть значение функции User от заданного email-адреса хранимого в базе if(User::exists($email)){ return new User($email); } // В противном случае создать нового пользователя в базе и вернуть значение функции User::create от указанного email return User::create($email); } /** * Создать нового пользователя и сохранить в базу * @param string $email. Пользовательский email-адрес * @return User */ private static function create($email){ // Записать нового пользователя и вернуть результат функции User от этих значений $result = ORM::for_table("reg_users")->create(); $result->email = $email; $result->save(); return new User($result); } /** * Проверить, существует ли такой пользователь в базе и вернуть булево значение переменной * @param string $email. Пользовательский email-адрес * @return boolean */ public static function exists($email){ // Существует ли пользователь в базе? $result = ORM::for_table("reg_users") ->where("email", $email) ->count(); return $result == 1; } /** * Создать новый пользовательский объект * @param экземпляр $param ORM , id, email or 0 * @return User */ public function __construct($param = null){ if($param instanceof ORM){ // ORM проверка пройдена $this->orm = $param; } else if(is_string($param)){ // Проверка на email пройдена $this->orm = ORM::for_table("reg_users") ->where("email", $param) ->find_one(); } else{ $id = 0; if(is_numeric($param)){ // идентификатору пользователя передаётся значение переменной $param $id = $param; } else if(isset($_SESSION["loginid"])){ // В противном случае смотри сессию $id = $_SESSION["loginid"]; } $this->orm = ORM::for_table("reg_users") ->where("id", $id) ->find_one(); } } /** * Сгенерировать новый SHA1 токен авторизации, записывает в базу и возвращает его значение * @return string */ public function generateToken(){ // Сгенерировать токен для авторизованного пользователя и сохранить его в базу $token = sha1($this->email.time().rand(0, 1000000)); // Сохранить токен в базе // И пометить его, что он актуален только в течение 10 следующих минут $this->orm->set("token", $token); $this->orm->set_expr("token_validity", "ADDTIME(NOW(),"0:10")"); $this->orm->save(); return $token; } /** * Авторизовать пользователя * @return void */ public function login(){ // Отметить пользователя, как авторизованного $_SESSION["loginid"] = $this->orm->id; // Обновить значение поля базы last_login $this->orm->set_expr("last_login", "NOW()"); $this->orm->save(); } /** * Уничтожить сессию и разлогинить пользователя * @return void */ public function logout(){ $_SESSION = array(); unset($_SESSION); } /** * Проверка, заходил ли пользователь * @return boolean */ public function loggedIn(){ return isset($this->orm->id) && $_SESSION["loginid"] == $this->orm->id; } /** * Проверка является ли пользователь администратором * @return boolean */ public function isAdmin(){ return $this->rank() == "administrator"; } /** * Найти тип пользователя, может быть либо administrator либо regular * @return string */ public function rank(){ if($this->orm->rank == 1){ return "administrator"; } return "regular"; } /** * Метод позволяющий получить приватную информацию пользователя в *качестве свойств объекта User * @param string $key Имя свойства, получающего доступ * @return mixed */ public function __get($key){ if(isset($this->orm->$key)){ return $this->orm->$key; } return null; } }
Токены генерируются с помощью SHA1 алгоритма и сохраняются в базе данных. Я использую функции времени MySQL, дабы задать 10-минутное ограничение актуальности токена.
Когда токен проходит процедуру валидации, мы напрямую говорим обработчику, что мы рассматриваем только токены, у которых ещё не истёк срок годности, хранимый в столбце token_validity.
Обратите внимание, что я использую волшебный метод __get библиотеки docs в конце файла, чтобы перехватить доступ к свойствам объекта User.
Благодаря этому становится возможным получить доступ к информации, хранящейся в базе, благодаря свойствам $user->email, $user->token и др. В следующем фрагменте кода рассмотрим для примера, как использовать эти классы.

Защищённая страница
Ещё один файл, хранящий полезный и необходимый функционал - это файл functions.php . Здесь есть несколько так называемых хелперов - функций-помощников, которые позволяют создавать более чистый и читабельный код в других файлах.
functions.php
Function send_email($from, $to, $subject, $message){ // Хелпер, отправляющий email $headers = "MIME-Version: 1.0" . "\r\n"; $headers .= "Content-type: text/plain; charset=utf-8" . "\r\n"; $headers .= "From: ".$from . "\r\n"; return mail($to, $subject, $message, $headers); } function get_page_url(){ // Определить URL PHP-файла $url = "http".(empty($_SERVER["HTTPS"])?"":"s")."://".$_SERVER["SERVER_NAME"]; if(isset($_SERVER["REQUEST_URI"]) && $_SERVER["REQUEST_URI"] != ""){ $url.= $_SERVER["REQUEST_URI"]; } else{ $url.= $_SERVER["PATH_INFO"]; } return $url; } function rate_limit($ip, $limit_hour = 20, $limit_10_min = 10){ // Количество попыток входа за последний час по этому IP-адресу $count_hour = ORM::for_table("reg_login_attempt") ->where("ip", sprintf("%u", ip2long($ip))) ->where_raw("ts > SUBTIME(NOW(),"1:00")") ->count(); // Количество попыток входа за последние 10 минут по этому IP-адресу $count_10_min = ORM::for_table("reg_login_attempt") ->where("ip", sprintf("%u", ip2long($ip))) ->where_raw("ts > SUBTIME(NOW(),"0:10")") ->count(); if($count_hour > $limit_hour || $count_10_min > $limit_10_min){ throw new Exception("Too many login attempts!"); } } function rate_limit_tick($ip, $email){ // Создать новую запись в таблице, считающей количество попыток входа $login_attempt = ORM::for_table("reg_login_attempt")->create(); $login_attempt->email = $email; $login_attempt->ip = sprintf("%u", ip2long($ip)); $login_attempt->save(); } function redirect($url){ header("Location: $url"); exit; }
Функции rate_limit и rate_limit_tick следят за количеством попыток авторизации за истёкший период времени с момента первой попытки. Попытка входа записывается в базе в столбец reg_login_attempt. Эти функции вызываются когда происходит обработка и отправка данных формы как вы можете видеть из следующего фрагмента кода.
Код ниже взят из файла index.php и он обрабатывает отправку формы. Он возвращает JSON-ответ, который, в свою очередь, обрабатывается jQuery в файле assets/js/script.js , который мы уже разбирали ранее.
index.php
Try{ if(!empty($_POST) && isset($_SERVER["HTTP_X_REQUESTED_WITH"])){ // Output a JSON header header("Content-type: application/json"); // Является ли этот email-адрес валидным if(!isset($_POST["email"]) || !filter_var($_POST["email"], FILTER_VALIDATE_EMAIL)){ throw new Exception("Please enter a valid email."); } // Проверка. Позволено ли пользователю авторизоваться, не превысил ли он количество допустимых подключений? (файл functions.php для большей информации) rate_limit($_SERVER["REMOTE_ADDR"]); // Записать эту попытку авторизации rate_limit_tick($_SERVER["REMOTE_ADDR"], $_POST["email"]); // Отправить письмо пользователю $message = ""; $email = $_POST["email"]; $subject = "Your Login Link"; if(!User::exists($email)){ $subject = "Thank You For Registering!"; $message = "Thank you for registering at our site!\n\n"; } // Попытка авторизовать или зарегистрировать пользователя $user = User::loginOrRegister($_POST["email"]); $message.= "You can login from this URL:\n"; $message.= get_page_url()."?tkn=".$user->generateToken()."\n\n"; $message.= "The link is going expire automatically after 10 minutes."; $result = send_email($fromEmail, $_POST["email"], $subject, $message); if(!$result){ throw new Exception("There was an error sending your email. Please try again."); } die(json_encode(array("message" => "Thank you! We\"ve sent a link to your inbox. Check your spam folder as well."))); } } catch(Exception $e){ die(json_encode(array("error"=>1, "message" => $e->getMessage()))); }
После успешной авторизации/регистрации код выше отправит пользователю ссылку для авторизации. Токен становится доступным, т.к. он передаётся в качестве переменной в генерируемой ссылке методом $_GET с маркером tkn
index.php
If(isset($_GET["tkn"])){ // Является ли этот токен валидным для авторизации? $user = User::findByToken($_GET["tkn"]); if($user){ // Да, является. Осуществить редирект на защищённую страницу $user->login(); redirect("protected.php"); } // Нет, токен не валидный. Осуществить редирект, на страницу с формой авторизации/регистрации redirect("index.php"); }
$user->login()
создаст необходимые переменные для сессии, так что пользователь, просматривая последующие страницы сайта, будет всё время оставаться авторизованным.
Похожим образом устроена и обработка функции на выход из системы.
index.php
If(isset($_GET["logout"])){ $user = new User(); if($user->loggedIn()){ $user->logout(); } redirect("index.php"); }
В конце кода, я снова поставил редирект на index.php, таким образом параметр ?logout=1 передаваемый посредством URL не требуется.
Наш файл index.php требует доп. защиты - мы не хотим, чтобы люди, которые когда-либо однажды авторизовались в системе опять видели форму регистрации. Для этих целей, мы используем метод $user->loggedIn() .
index.php
$user = new User(); if($user->loggedIn()){ redirect("protected.php"); }
Наконец-то, вот кусок кода, позволяющий защитить страницы вашего сайта и сделать её доступной только после авторизации.
protected.php
// Чтобы защитить каждую страницу на вашем сайте подключите к ней файл // main.php и создайте новый объект User. Вот как это просто! require_once "includes/main.php"; $user = new User(); if(!$user->loggedIn()){ redirect("index.php"); }
После этой проверки можете быть уверенными, что пользователь был успешно авторизован. Вы также можете получить доступ к хранимой информации в базе с помощью свойств объекта $user . Для вывода email-а пользователя и его статуса используйте этот код:
Echo "Your email: ".$user->email; echo "Your rank: ".$user->rank();
Метод rank() используется здесь потому что в базе обычно хранятся номера (0 для обычного пользователя, 1 для администратора) и нам нужно преобразовать эти данные в статусы, к которым они относятся, в чём нам и помогает этот метод.
Чтобы сделать из обычного пользователя администратора, просто отредактируйте пользовательскую запись через phpMyAdmin (или любую другую программу, позволяющую управлять базами данных). Статус администратора не даёт каких-либо привилегий, в данном примере на странице будет выведено, что вы администратор - и всё.
А вот что с этим делать - остаётся уже на ваше усмотрение, вы можете сами написать и составить код, задающий определённые привилегии и возможности для администраторов.
Мы закончили!
С этой невероятно супер квази простой формой мы закончили! Вы можете использовать её в ваших PHP-сайтах, это достаточно просто. Также вы можете модифицировать её под себя и сделать её такой, как вы хотите.
Материал подготовил Денис Малышок специально для сайта сайт
P.S. Хотите двигаться дальше в освоении PHP и ООП? Обратите внимание на премиум-уроки по различным аспектам сайтостроения, включая программирование на PHP, а также на бесплатный курс по созданию своей CMS-системы на PHP с нуля с использованием ООП:
Понравился материал и хотите отблагодарить?
Просто поделитесь с друзьями и коллегами!
Over the past few years, web hosting has undergone a dramatic change. Web hosting services have changed the way websites perform. There are several kinds of services but today we will talk about the options that are available for reseller hosting providers. They are Linux Reseller Hosting and Windows Reseller Hosting. Before we understand the fundamental differences between the two, let’s find out what is reseller hosting.
Reseller Hosting
In simple terms, reseller hosting is a form of web hosting where an account owner can use his dedicated hard drive space and allotted bandwidth for the purpose of reselling to the websites of third parties. Sometimes, a reseller can take a dedicated server from a hosting company (Linux or Windows) on rent and further let it out to third parties.
Most website users either are with Linux or Windows. This has got to do with the uptime. Both platforms ensure that your website is up 99% of the time.
1. Customization
One of the main differences between a Linux Reseller Hostingplan and the one provided by Windows is about customization. While you can experiment with both the players in several ways, Linux is way more customizable than Windows. The latter has more features than its counterpart and that is why many developers and administrators find Linux very customer- friendly.
2. Applications
Different reseller hosting services have different applications. Linux and Windows both have their own array of applications but the latter has an edge when it comes to numbers and versatility. This has got to do with the open source nature of Linux. Any developer can upload his app on the Linux platform and this makes it an attractive hosting provider to millions of website owners.
However, please note that if you are using Linux for web hosting but at the same time use the Windows OS, then some applications may not simply work.
3. Stability
While both the platforms are stable, Linux Reseller Hosting is more stable of the two. It being an open source platform, can work in several environments.This platform can be modified and developed every now and then.
4. .NET compatibility
It isn’t that Linux is superior to Windows in every possible way. When it comes to .NET compatibility, Windows steals the limelight. Web applications can be easily developed on a Windows hosting platform.
5. Cost advantages
Both the hosting platforms are affordable. But if you are feeling a cash crunch, then you should opt for Linux. It is free and that is why it is opted by so many developers and system administrators all around the world.
6. Ease of setup
Windows is easier to set up than its counterpart. All things said and done, Windows still retains its user-friendliness all these years.
7. Security
Opt for Linux reseller hosting because it is more secure than Windows. This holds true especially for people running their E-commerce businesses.
Conclusion
Choosing between the two will depend on your requirement and the cost flexibility. Both the hosting services have unique advantages. While Windows is easy to set up, Linux is cost effective, secure and is more versatile.

Back in March of this year, I had a very bad experience with a media company refusing to pay me and answer my emails. They still owe me thousands of dollars and the feeling of rage I have permeates everyday. Turns out I am not alone though, and hundreds of other website owners are in the same boat. It"s sort of par for the course with digital advertising.
In all honesty, I"ve had this blog for a long time and I have bounced around different ad networks in the past. After removing the ad units from that company who stiffed me, I was back to square one. I should also note that I never quite liked Googles AdSense product, only because it feels like the "bottom of the barrel" of display ads. Not from a quality perspective, but from a revenue one.
From what I understand, you want Google advertising on your site, but you also want other big companies and agencies doing it as well. That way you maximize the demand and revenue.
After my negative experience I got recommend a company called Newor Media . And if I"m honest I wasn"t sold at first mostly because I couldn"t find much information on them. I did find a couple decent reviews on other sites, and after talking to someone there, I decided to give it a try. I will say that they are SUPER helpful. Every network I have ever worked with has been pretty short with me in terms of answers and getting going. They answered every question and it was a really encouraging process.
I"ve been running the ads for a few months and the earnings are about in line with what I was making with the other company. So I can"t really say if they are that much better than others, but where they do stand out is a point that I really want to make. The communication with them is unlike any other network I"ve ever worked it. Here is a case where they really are different:
They pushed the first payment to me on time with Paypal. But because I"m not in the U.S (and this happens for everyone I think), I got a fee taken out from Paypal. I emailed my representative about it, asking if there was a way to avoid that in the future.
They said that they couldn"t avoid the fee, but that they would REIMBURSE ALL FEES.... INCLUDING THE MOST RECENT PAYMENT! Not only that, but the reimbursement payment was received within 10 MINUTES! When have you ever been able to make a request like that without having to be forwarded to the "finance department" to then never be responded to.
The bottom line is that I love this company. I might be able to make more somewhere else, I"m not really sure, but they have a publisher for life with me. I"m not a huge site and I don"t generate a ton of income, but I feel like a very important client when I talk to them. It"s genuinely a breathe of fresh air in an industry that is ripe with fraud and non-responsiveness.
Microcomputers that have been created by the Raspberry Pi Foundation in 2012 have been hugely successful in sparking levels of creativity in young children and this UK based company began offering learn-to-code startup programs like pi-top an Kano. There is now a new startup that is making use of Pi electronics, and the device is known as Pip, a handheld console that offers a touchscreen, multiple ports, control buttons and speakers. The idea behind the device is to engage younger individuals with a game device that is retro but will also offer a code learning experience through a web based platform.

The amazing software platform being offered with Pip will offer the chance to begin coding in Python, HTML/CSS, JavaScript, Lua and PHP. The device offers step-by-step tutorials to get children started with coding and allows them to even make LEDs flash. While Pip is still a prototype, it will surely be a huge hit in the industry and will engage children who have an interest in coding and will provide them the education and resources needed to begin coding at a young age.
Future of Coding Coding has a great future, and even if children will not be using coding as a career, they can benefit from learning how to code with this new device that makes it easier than ever. With Pip, even the youngest coding enthusiasts will learn different languages and will be well on their way to creating their own codes, own games, own apps and more. It is the future of the electronic era and Pip allows the basic building blocks of coding to be mastered.Computer science has become an important part of education and with devices like the new Pip , children can start to enhance their education at home while having fun. Coding goes far beyond simply creating websites or software. It can be used to enhance safety in a city, to help with research in the medical field and much more. Since we now live in a world that is dominated by software, coding is the future and it is important for all children to at least have a basic understanding of how it works, even if they never make use of these skills as a career. In terms of the future, coding will be a critical component of daily life. It will be the language of the world and not knowing computers or how they work can pose challenges that are just as difficult to overcome as illiteracy.
Coding will also provide major changes in the gaming world, especially when it comes to online gaming, including the access of online casinos. To see just how coding has already enhanced the gaming world, take a look at a few top rated casino sites that rely on coding. Take a quick peek to check it out and see just how coding can present realistic environments online.How Pip Engages Children When it comes to the opportunity to learn coding, children have many options. There are a number of devices and hardware gizmos that can be purchased, but Pip takes a different approach with their device. The portability of the device and the touchscreen offer an advantage to other coding devices that are on the market. Pip will be fully compatible with electronic components in addition to the Raspberry Pi HAT system. The device uses standard languages and has basic tools and is a perfect device for any beginner coder. The goal is to remove any barriers between an idea and creation and make tools immediately available for use. One of the other great advantages of Pip is that it uses a SD card, so it can be used as a desktop computer as well when it is connected to a monitor and mouse.
The Pip device would help kids and interested coder novice with an enthusiasm into learning and practicing coding. By offering a combination of task completion and tinkering to solve problems, the device will certainly engage the younger generation. The device then allows these young coders to move to more advanced levels of coding in different languages like JavaScript and HTML/CSS. Since the device replicates a gaming console, it will immediately capture the attention of children and will engage them to learn about coding at a young age. It also comes with some preloaded games to retain attention, such as Pac-Man and Minecraft. Innovations to Come Future innovation largely depends on a child’s current ability to code and their overall understanding of the process. As children learn to code at an early age by using such devices as the new Pip, they will gain the skills and knowledge to create amazing things in the future. This could be the introduction of new games or apps or even ideas that can come to life to help with medical research and treatments. There are endless possibilities. Since our future will be controlled by software and computers, starting young is the best way to go, which is why the new Pip is geared towards the young crowd. By offering a console device that can play games while teaching coding skills, young members of society are well on their way to being the creators of software in the future that will change all our lives. This is just the beginning, but it is something that millions of children all over the world are starting to learn and master. With the use of devices like Pip, coding basics are covered and children will quickly learn the different coding languages that can lead down amazing paths as they enter adulthood.
Creating a membership based site seems like a daunting task at first. If you ever wanted to do this by yourself, then just gave up when you started to think how you are going to put it together using your PHP skills, then this article is for you. We are going to walk you through every aspect of creating a membership based site, with a secure members area protected by password.
The whole process consists of two big parts: user registration and user authentication. In the first part, we are going to cover creation of the registration form and storing the data in a MySQL database. In the second part, we will create the login form and use it to allow users access in the secure area.
You can download the whole source code for the registration/login system from the link below:
Configuration & Upload
The ReadMe file contains detailed instructions.
Open the source\include\membersite_config.php file in a text editor and update the configuration. (Database login, your website’s name, your email address etc).
Upload the whole directory contents. Test the register.php by submitting the form.
The registration formIn order to create a user account, we need to gather a minimal amount of information from the user. We need his name, his email address and his desired username and password. Of course, we can ask for more information at this point, but a long form is always a turn-off. So let’s limit ourselves to just those fields.
Here is the registration form:
Register Your Full Name*: Email Address*: UserName*: Password*:
So, we have text fields for name, email and the password. Note that we are using the for better usability.
Form validationAt this point it is a good idea to put some form validation code in place, so we make sure that we have all the data required to create the user account. We need to check if name and email, and password are filled in and that the email is in the proper format.
Handling the form submissionNow we have to handle the form data that is submitted.
Here is the sequence (see the file fg_membersite.php in the downloaded source):
function RegisterUser() { if(!isset($_POST["submitted"])) { return false; } $formvars = array(); if(!$this->ValidateRegistrationSubmission()) { return false; } $this->CollectRegistrationSubmission($formvars); if(!$this->SaveToDatabase($formvars)) { return false; } if(!$this->SendUserConfirmationEmail($formvars)) { return false; } $this->SendAdminIntimationEmail($formvars); return true; }
First, we validate the form submission. Then we collect and ‘sanitize’ the form submission data (always do this before sending email, saving to database etc). The form submission is then saved to the database table. We send an email to the user requesting confirmation. Then we intimate the admin that a user has registered.
Saving the data in the databaseNow that we gathered all the data, we need to store it into the database.
Here is how we save the form submission to the database.
function SaveToDatabase(&$formvars) { if(!$this->DBLogin()) { $this->HandleError("Database login failed!"); return false; } if(!$this->Ensuretable()) { return false; } if(!$this->IsFieldUnique($formvars,"email")) { $this->HandleError("This email is already registered"); return false; } if(!$this->IsFieldUnique($formvars,"username")) { $this->HandleError("This UserName is already used. Please try another username"); return false; } if(!$this->InsertIntoDB($formvars)) { $this->HandleError("Inserting to Database failed!"); return false; } return true; }
Note that you have configured the Database login details in the membersite_config.php file. Most of the cases, you can use “localhost” for database host.
After logging in, we make sure that the table is existing.(If not, the script will create the required table).
Then we make sure that the username and email are unique. If it is not unique, we return error back to the user.
This is the table structure. The CreateTable() function in the fg_membersite.php file creates the table. Here is the code:
function CreateTable() { $qry = "Create Table $this->tablename (". "id_user INT NOT NULL AUTO_INCREMENT ,". "name VARCHAR(128) NOT NULL ,". "email VARCHAR(64) NOT NULL ,". "phone_number VARCHAR(16) NOT NULL ,". "username VARCHAR(16) NOT NULL ,". "password VARCHAR(32) NOT NULL ,". "confirmcode VARCHAR(32) ,". "PRIMARY KEY (id_user)". ")"; if(!mysql_query($qry,$this->connection)) { $this->HandleDBError("Error creating the table \nquery was\n $qry"); return false; } return true; }
The id_user field will contain the unique id of the user, and is also the primary key of the table. Notice that we allow 32 characters for the password field. We do this because, as an added security measure, we will store the password in the database encrypted using MD5. Please note that because MD5 is an one-way encryption method, we won’t be able to recover the password in case the user forgets it.
Inserting the registration to the tableHere is the code that we use to insert data into the database. We will have all our data available in the $formvars array.
function InsertIntoDB(&$formvars) { $confirmcode = $this->MakeConfirmationMd5($formvars["email"]); $insert_query = "insert into ".$this->tablename."(name, email, username, password, confirmcode) values ("" . $this->SanitizeForSQL($formvars["name"]) . "", "" . $this->SanitizeForSQL($formvars["email"]) . "", "" . $this->SanitizeForSQL($formvars["username"]) . "", "" . md5($formvars["password"]) . "", "" . $confirmcode . "")"; if(!mysql_query($insert_query ,$this->connection)) { $this->HandleDBError("Error inserting data to the table\nquery:$insert_query"); return false; } return true; }
Notice that we use PHP function md5() to encrypt the password before inserting it into the database.
Also, we make the unique confirmation code from the user’s email address.
Now that we have the registration in our database, we will send a confirmation email to the user. The user has to click a link in the confirmation email to complete the registration process.
function SendUserConfirmationEmail(&$formvars) { $mailer = new PHPMailer(); $mailer->CharSet = "utf-8"; $mailer->AddAddress($formvars["email"],$formvars["name"]); $mailer->Subject = "Your registration with ".$this->sitename; $mailer->From = $this->GetFromAddress(); $confirmcode = urlencode($this->MakeConfirmationMd5($formvars["email"])); $confirm_url = $this->GetAbsoluteURLFolder()."/confirmreg.php?code=".$confirmcode; $mailer->Body ="Hello ".$formvars["name"]."\r\n\r\n". "Thanks for your registration with ".$this->sitename."\r\n". "Please click the link below to confirm your registration.\r\n". "$confirm_url\r\n". "\r\n". "Regards,\r\n". "Webmaster\r\n". $this->sitename; if(!$mailer->Send()) { $this->HandleError("Failed sending registration confirmation email."); return false; } return true; }
Updates9th Jan 2012
Reset Password/Change Password features are added
The code is now shared at GitHub .
Welcome back !
License
The code is shared under LGPL license. You can freely use it on commercial or non-commercial websites.
No related posts.
Comments on this entry are closed.